Did you know there’s a proper way to lay sod for optimal growth and appearance? Follow our steps and graphics below to install your sod the correct way.
But before you purchase your sod, ask yourself this: is your site prepped? If not, check out our site preparation guide!
How to Lay Your Own Sod
1. Timing
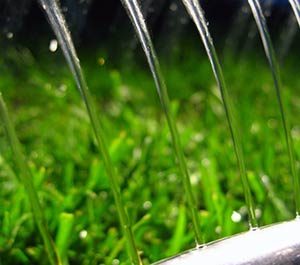
Sod is a living, perishable plant. For that reason, install your sod immediately after delivery. It will heat up and begin to ferment if left rolled up. Start watering your sod as soon as you lay it, don’t wait until you’re finished laying all of it.
2. Starting
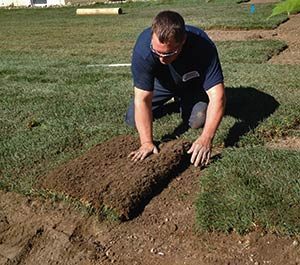
Locate a straight edge, such as a walkway or driveway, or run a taut string up the middle of the area to be sodded. Work along the line to establish the first row then work off that row to fill in the rest of the area.
3. Laying The Sod
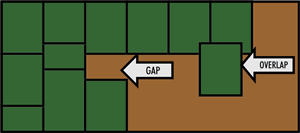
Lay the sod in a brickwork fashion, smoothing the soil in advance of sod laying. Make sure the joints are butted together snugly without overlapping. too tight and the edges won’t knit ot the ground, too loose and weeds can grow through the gaps. If laying sod on slopes, lay the slabs perpendicular to the slope. Use sod staples to secure the sod on steep slopes if necessary.
4. Shaping
Use a sharp knife to cut and shape sod around curves, trees and borders. Save the scraps to fill in gaps if needed.
5. Rolling
To smooth out any small bumps, remove air pockets and improve sod-to-soil contact, roll installed sod with a roller one-third filled with water. Avoid using a heavy roller which will compact the site.